

Remember to sign up for my special blog give away. Just click
sign up and read the directions at the end of the post :)
* I am excited to award this gift!!!
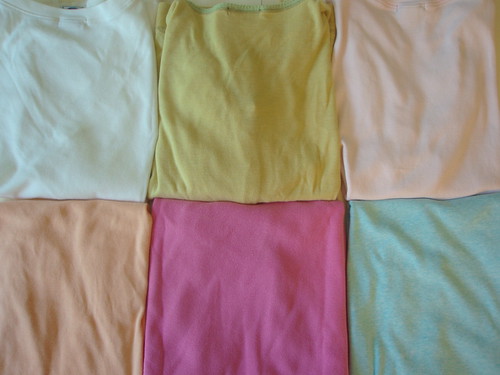
Today Is the Colors of Summer project! I have been saving my old
t-shirts and wearing some others for gardening. I just could not part
with them. Their colors were still fresh and cheerful and in good
shape... but not really for wearing out. While cleaning out my closet
this spring I found the saved stash of shirts. Having just put away
some winter throws from our living room the idea of a "summer throw"
for my family seemed perfect! Perfectly easy I imagined and I do believe
it came out that way also!
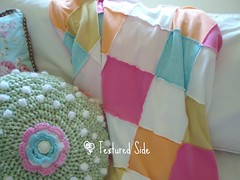
This throw is like a quilt but their are no "insides" to the quilt. Just the
top and it's textured back :) Perfect! You could finish this in 2-3 days
worth of free time!
*** Just think of the cute t-shirts that our children have or teenagers!
Oh the posibilities!
*** Think about the dimensions of the throw you would like to end up with
OR just cut out all of the t-shirts and "wing-it".
*"wing-it" is not a dance that chickens do :) It is a dance that
we/some of us do sometimes or even all of the time! makes life exciting!
Let's get started~
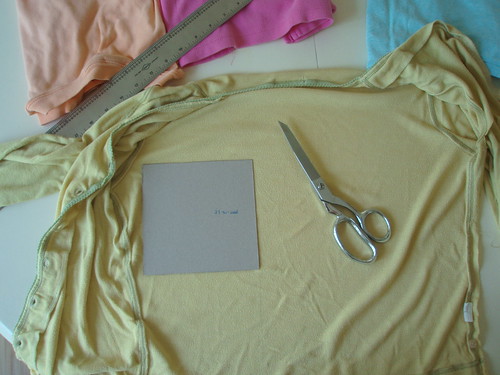
Supplies:
*old t-shirts {with or without decoration/designs}
*thread
*scissors
*square of cardboard {size of the squares you would like your quilt to have and
PERFECTLY SQUARE}
*iron {makes cutting easier}
1) Select your t-shirts, or the fav's of the one you are making this for...
oh! with their permission! heehhe
2) Iron t-shirts. You can do this all at once or one at a time.
*this makes cutting out precise squares much more enjoyable!!!
3) Use your cardboard square template, place it on one of your t-shirts and start
tracing around the template with a soft pencil washable pen.. I used pencil
with an ultra light hand so as to barely see it.
*Place the template strategically so you use the t-shirt fabric with little waste.
4) Keep the squares in nice neat piles so there is no chance of stretching or wrinkling.
*it HELPS to keep the WEAVE {just go by those little lines that all t-shirt
fabrics have} of the fabric in the same direction in the piles.
a techy type of thing but it will keep everything going SQUARE when you start
to sew :)
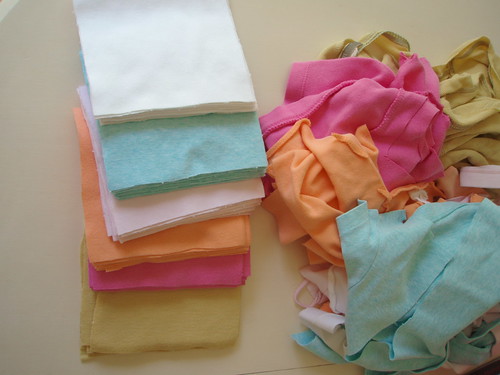
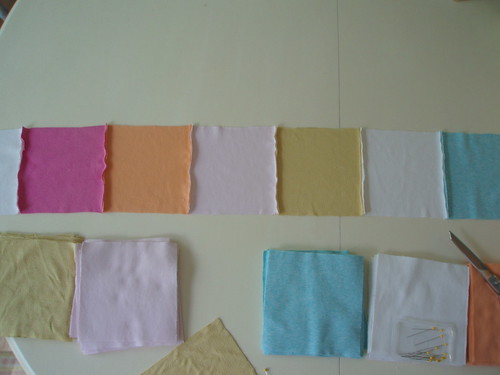
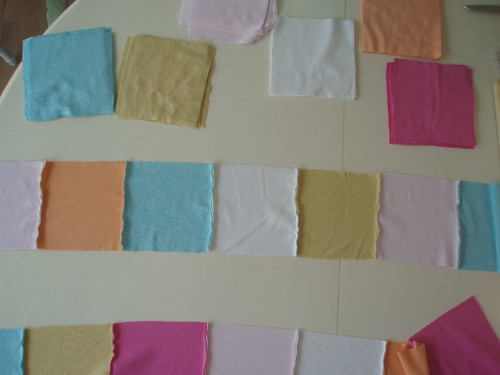
5) All t-shirts are cut and in there color pile. Let's lay out the squares for ONE row.
Just arrange in a color pattern that pleases YOU:)
*i went horizontal here...rather the width of the fabric.
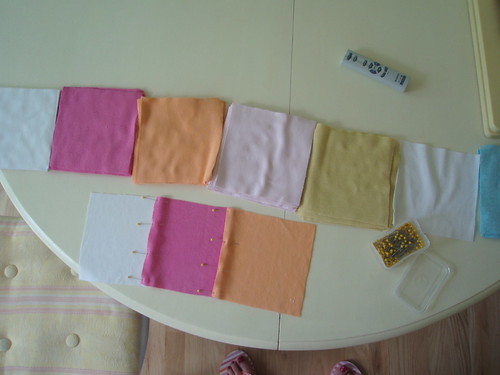
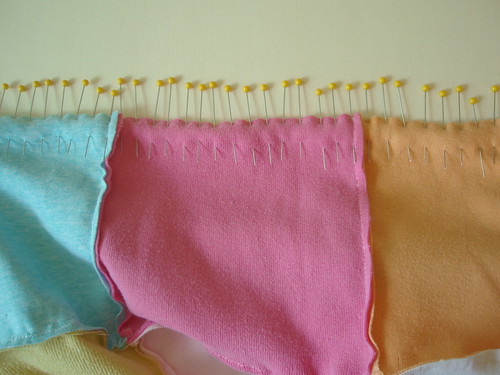
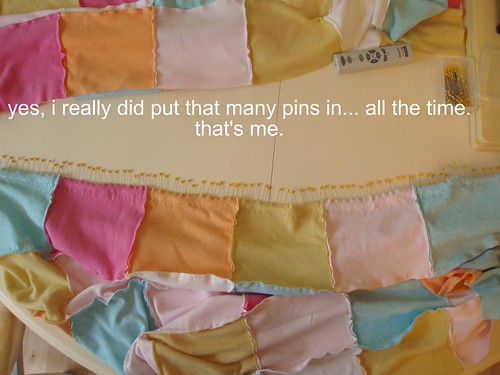
6) Pin your first row of squares together and use as many pins as you need to get
nice neat squares. Neatness does pay off in this project.
7) First row done.
Layout the next row above the first row until you get a pleasing arrangement.
PIN & SEW the second row.
*YOU NOW HAVE TWO SEPARATE HORIZONTAL ROWS.
8) Continue in this manner until you have the desired number of rows built up.
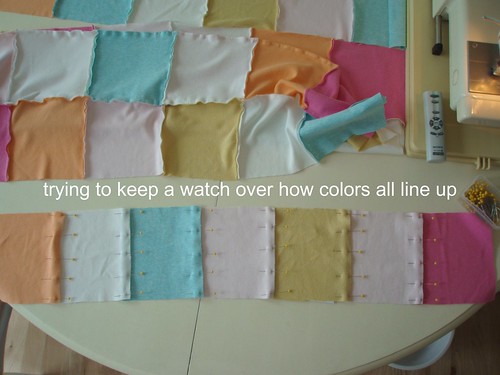
9) NOW you can start to attach the rows VERTICALLY TOGETHER.
*Match up the seams.
*I matched up and sewed a row at a time and did it in two halves so that
I only had to work with the bulk of the fabric once, when I sewed the final
middle seam. :)
10) You can stop here or continue on with a binding around the perimeter of the
t-shirt throw.
Why did I not move this Gazing ball out of my way!!!???

For the border/binding around the edges, I used some left over favorite fabric that I used here originally :)
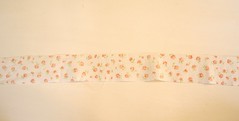
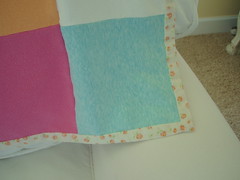
This fabric was a perfect match-up for me!
I just cut four strips of about 2 1/4" wide. Two for length and two for width of the finished t-shirt throw.
***OH, cut them each about 3" longer than the sides of the throw.
Pin strips on opposing ends, sew. Sew with a 1/4" or smaller seam.
Then same for remaining 2 sides.
Press under the outer edge of the strips by 1/4".
Fold binding over to cover the seam and press.
pin and hand sew Or machine sew binding around the T-shirt Throw.
You ARE DONE :)
Whew! This project is much easier than my lengthy directions seem to
imply. I tend to like to give a lot of pointers... just ask my daughter and son!
Remember, this is just a bunch of T-shirts :)
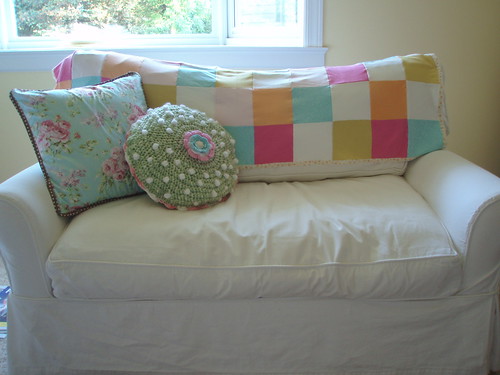

I hope that you make this T-Shirt Throw. Now that I have the final photos finally taken I am going to start using it... Just in time for our heat wave this weekend LOL!
I am going to figure out how to start a flickr group for your Celebration Projects :) {just look at my empty side bar... sewing etc. I know, computers~ not so much.
Thank You for playing :)
See you tomorrow :)
Hugs, Mary


5 comments:
Oh Mary you need to come to CT and teach me to sew! I LOVE this!
Karla
This is super sweet in it's sherberty colors. (And it has my brain ticking...perhaps I should get my serger rethreaded stat, I think that would make the sewing easier.)
Wow! what a lot of pins Mary.
I love your project and it what a great idea, using all your old tee shirts.
You have made a pretty throw.
Hugs
Carolyn
ehhehe,
I told you I was techy like that :) All of those pins!!!
It comes from working with Plaids AND HOme Ec classes! Match match match to get an "A".
A serger must be a joy to use Sarah!!!
And say, I am a big sister to four beautiful and wonderful sisters... so "teaching" is a thrill for me!
Thank You girls!!!
Hugs,
Mary
That throw is SO cute! I just saw it now!!!! Cute! but I cannot sew, though my mother is a master quilter. :)
Angie
Post a Comment