
I have a TUTORIAL FOR YOU!!! I am very excited to be able to FINALLY share it with you. I first learned/saw this, quite a few years ago. I was shopping at Anthropologie during the Christmas season when I spied IT!!! "IT" was beautifully draped across a display table. I was hoping it was for sale but it was a display piece. Lucky for me the person I spoke to about it actually helped to make it.
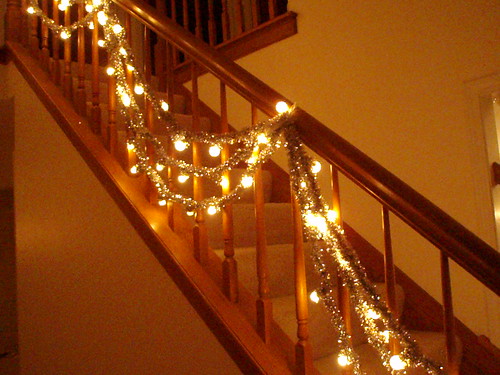
HERE "IT" IS!!!~~~~
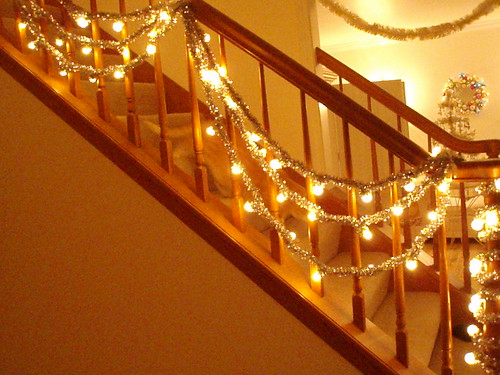
A GORGEOUS LIGHTED SILVER GARLAND!
She told me of the tedeous work of winding silver tinsel pipe cleaners around and around the string of lights. Yes, I thought, but soooo worth it!!!! The light set that I originally found (as seen in the above photo) had larger light bulbs on it. They were round globes in just over 1" size but the original Anthropologie string had TINY globes. So, this meant that pipe cleaners would not be sufficient to cover the strand that I had. I came to a very lucky conclusion! Silver tinsel garland! I found a smaller size of garland than we are used to finding! It was about 1 1/4" in width. I had to use twist ties at the begining and ends, for this was before double stick tape. So, I say all of this so that if you want to use the larger globe lighted garland you can still make one!!!
LET'S BEGIN :O

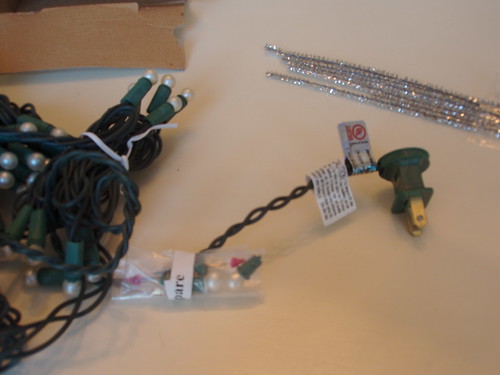
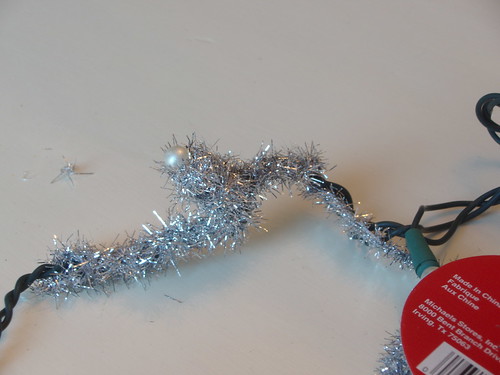
In the above photo you will see some supplies:
a TINY globe of 3/8" diameter lighted string set
silver tinsel pipe cleaners (regular or chenille)*
OR silver tinsel "ribbon"*
STRONG double stick tape.
*please note that you will need MANY bags of pipe cleaners or rolls of the ribbon, which ever style you chose.
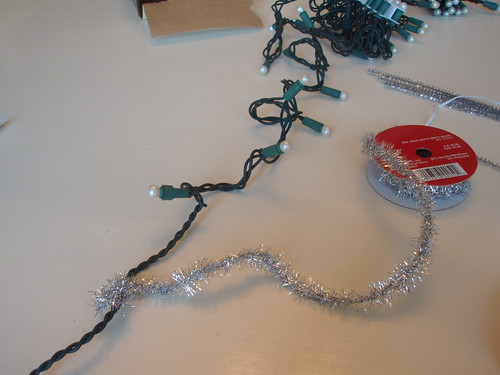
1. Place double stick tape down at the point you wish to start the silver tinsel. Peel off the top "red plastic" to reveal the sticky top layer.
2. Place the beginning tinsel end onto the sticky tape.
2. Now start wrapping the tinsel around and around. Yes, it is tedious, but worth it.
3. When you reach a globe bulb, just wrap "up" the shaft of the bulb and then back down and continue on along the string.
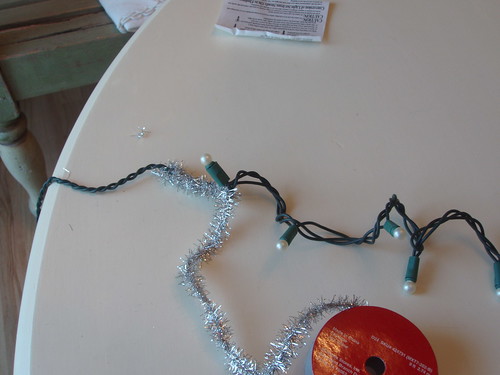
4. When you come to the end of the tinsel, place a new piece of sticky tape down to secure the end of the tinsel AND to secure the start of a new piece of tinsel.
5. Continue until complete.
*NOTE* if using Silver Tinsel Ribbon, place a spot of double stick tape or hot glue to the beginning and again at the end to
stop any unraveling of the ribbon.
Hang or drape your beautiful garland around to help ring in the NEW YEAR!
My computer was fixed in 24 hours!!!! BUT, my hubby got his new computer and new....the results were problems with the internet for ALL of our computers! Our internet is working again... so many technical problems!!!
I will be back before the New Year. I have a trip to Shabby Chic~Chicago to show you!!!
I hope that you ALL had and are having a beautiful Christmas Season!!!
I have missed you all so dearly!
HUGS,
Mary


14 comments:
great idea!!!
turned out beautiful!
happy holidays!
jessi nagy
hi, I'm just bopping around from place to place and found you here. I love your new years eve lights! what a great idea! I wish I didnt have to go to work everyday and still had the money to play with ! such fun!!
vivian
Wow,
I love that! I want to try it.
Thanks for sharing.
Happy New Year!
Rosemary
Oh my!!! I LOVE LOVE LOVE this!!! I must do it!
Thank you so much for sharing it! Happy New Year to you! xo Heather
Wow that looks wonderful. I haven't seen pearlised globes like that before. maybe we don't have them here in Australia or maybe I just haven't been looking properly.
Alison
Lovely Mary! Thank you for sharing. This would be great for a winter decoration - not just for Christmas!
Karla
So pretty!
Thanks for sharing...
Happy New Year,
Priscilla
My goodness Mary, you are a patient one! I am not sure I could do this, would love, just not sure how I could follow through to the end. Thanks for showing us yours, its great!
Also a big fat Kudos to you, I just finished reading your article in SOMERSET HOME! You go girl!!
Your friend,
Dede
PS. Now I can say, "I knew you when."
What fun....we love Anthropologie and we love this idea...thank you so much for the tutorial!
Have a blessed New Year!
kari and kijsa
Dear Mary,
Love this idea, so very pretty,
Have a wonderful New Year Pinkie
Please stop by my blog. I'm having a party for a friend of yours. Smiles,
Nan
What beautiful garland...a wonderful idea.
Thanks so much for coming to my birthday party...and I do hope your New Year is just fabulous.
bj
How beautiful and creative! Thank you for taking the time to show us how it's done :)
HAppy New year!
Amy
What an elegant garland!!!! Thank you so much for sharing.
Darlene
Post a Comment