
Do You like!?? It might be coming to YOUR HOME! Did you sign up HERE yet? This is just ONE of the prizes :o
Winner will be announced on Monday, 6.30.08.
This was a project planned way in advance...BUT! I could not find the very delicious pink pincushion at our Jo-Ann Fabric store. And I had not been to Genevea (wimper) or other areas lately were they are also located. Was I going to have to belly up to the gas station and pay the continually increasing gas price in my Chicago Land search for a pink pincushion!!!
THEN THIS came in my e-mail from Martha!!! (So very sweet of her to think of ME...hehehe)
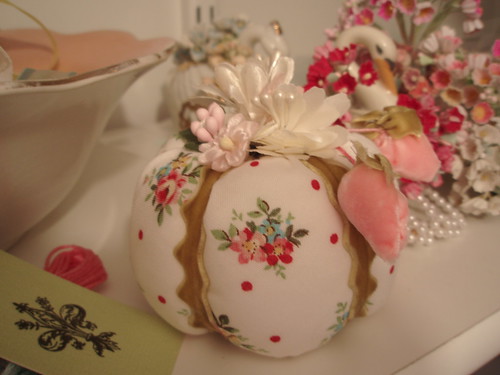
"Homegrown" Tomato Pincushions
These whimsical sewing-box staples are just as sweet as garden-grown tomatoes, and you don't have to wait until summer to enjoy them. Pincushions were once set on mantels in new homes to bring occupants prosperity, and these versions, with their fresh-from-the-vine colors, would in fact look lovely on display. Stitch a robust heirloom variety in loosely woven linen or cherry tomatoes in dainty gingham. A few dollars will yield enough supplies for a bumper crop, no weeding required.
Pincushion How-To
1. Cut a rectangle of fabric on the bias that's twice as long as it is wide (the largest we made was 3 1/4 inches in diameter and required a 10-by-5-inch piece).With fabric facing right side up, fold in half as shown, and join ends with a 1/4-inch seam. Sew a running stitch around the top edge; tightly pull thread to cinch fabric, and secure with stitches.
2. Turn pouch right side out. Stuff with batting (cotton batting is firmer than polyester). Sew a running stitch around the open end; pull thread to cinch fabric. Tack shut with a few stitches and knot. To flatten, double-thread a cording needle with crochet thread and pull it through the "core" a few times. Mimic a tomato's fluted details by wrapping the thread around the cushion and back through the core several times. Knot thread at top to finish.
3. For heirloom tomatoes, cut a circle of fabric (the largest we made was 3 1/2 inches in diameter and required a 10-inch-diameter circle). With fabric wrong side up, sew a running stitch around perimeter. Place batting in center of fabric, and gather into a pouch. Stuff with more batting, pull thread to cinch, and tack with stitches. Flatten cushion and apply details as in step 2.
4. For tops, photocopy template, enlarging or reducing as desired; cut out. Trace template onto green felt with a disappearing-ink pen; cut out. Using a single-threaded needle, sew a loop onto top. Glue top to tomato.
Note: To sew cherry-tomato pincushions, start with swatches of fabric that are 2 3/4 by 4 3/4 inches. Follow steps 1 and 2 below, but don't flatten cushion or add fluted details. For tops, cut symmetrical, six-pointed stars from green felt. Add loops, and attach them as in step 4.
First Published: March 2006 THANK YOU MARTHA! If you go to her link you can see photos of the directions and print it out.
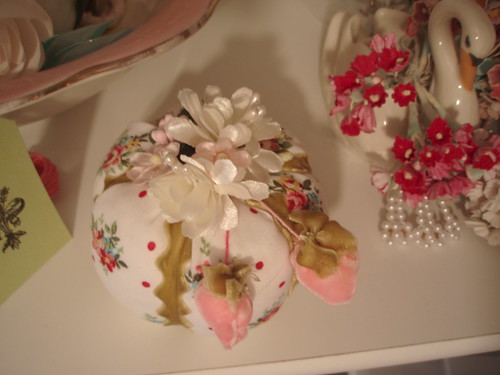
Her are a few photos of mine, one in progress:

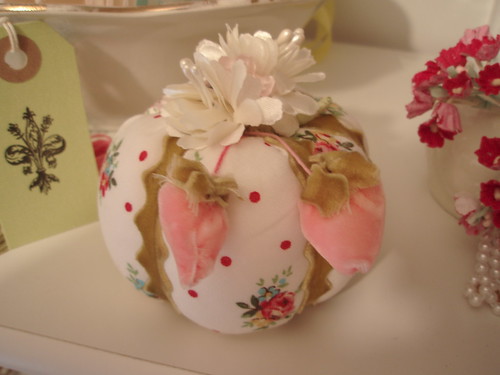
This project is not easy, but not too difficult! I will try to make up others for my etsy shop this weekend.
TWO "PROJECTS" TODAY!!!
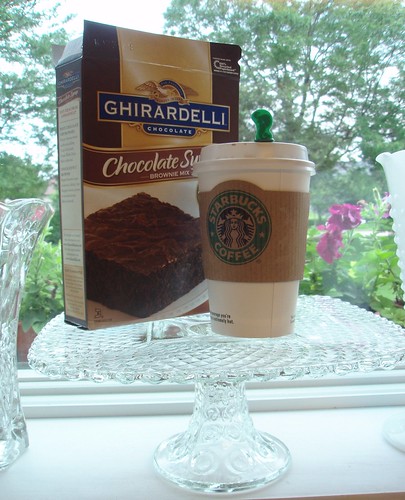
Do you see the cute little green thing in the Starbucks cup? I have never seen one before as I am not a coffee drinker. I prefer Hot Cocoa, on occasion, when there is at least a cool breeze... the green stick is a plug so you do not spill it! Love that, especially when checking out of the grocery store.
This is the brownie mix I like to use. They always turn out and it speeds things up when company is coming so...
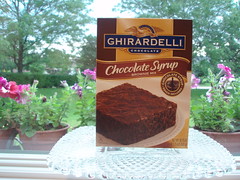
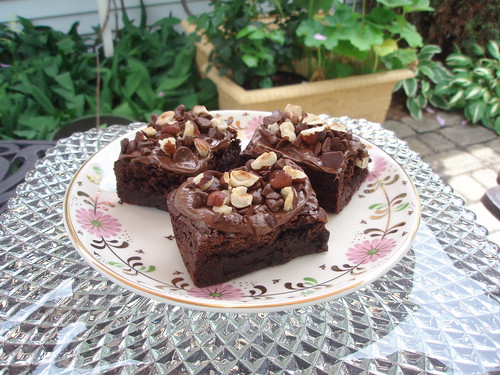
you can have time to do THIS to them:

Yumm! All you have to do is:
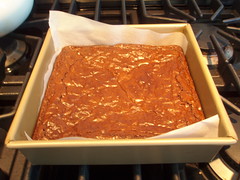
1) Bake your brownies IN A PARCHMENT LINED pan
2) Cool
3) Remove brownie from pan as one whole piece, onto cutting board.
4) Cut into serving size pieces
5) Spread NUTELLA, oh yaya, on to each peice
6) Sprinkle with mini chocolate chips, I used semi sweet
7) Sprinkle with chopped Hazel nuts
8) PLACE UNDER BROILE FOR A MOMENT just to soften chips
9) Place in fridge for... as long as you can stand waiting... to firm up a bit.
10) ENJOY
Here, take a Bite!
Merci ainsi de venir chaque jour ! C'était TOUT pour VOUS ! et j'ai eu plaisir à te le présenter tellement beaucoup !
Thank you so for coming each day!
This was ALL for YOU!
and I enjoyed presenting it to you so very much!
OH MERCI!
Hugs,
Mary


8 comments:
Oh what adorable pin cushions! I love the colors and textures and flowers on them. What a decadent thing to do to brownies, I must tell hubby about it so he can do the same to his next batch of famous brownies.
YUMMO!!!!
those look so so good!!
cute pin cushion too.
oxoxox,
jessi
I do like it! Really enjoying visiting you daily, loving the tutorials, thanks so much, Rachael
Two of my favorite things...well, three! Tomatoes, coffee and chocolate :) I want Giada's waistline while we are at it...honestly...she can't be eating any of what she cooks!!!
Thank you for the fun this week Mary. Don't stop, okay?
Now you really got me with those brownies! Yumm..from one who loves starbucks and brownies!
Do I like??? I LOVE it! That has got to be the most adorable pin cushion, ever! So very cute! ;) Thank you so much for sharing...
Oh, and I must admit, those chocolate brownies ARE to die for.... I will have to add the nutella and hazelnuts next time! OH MERCI! is right! ;)
Hugs,
Shannon
Oh my gosh! My sister and I (esp. my sister) are major Nutella fans! This is sooo fantastic Mary! I'm definitely going to give it a try.
Karla
Those brownies look so good!! Thanks for stopping by, T
Post a Comment